Create an Appointment
Table of Contents
Syncro provides you with numerous opportunities to schedule appointments. If you set up a calendar integration, the appointments can also automatically sync between Syncro and Outlook/Office 365 or Google Calendar.
Read on, or watch this short video to learn more:
Prerequisites
Before scheduling appointments, there are a few things you may want to set up:
- Business Hours: This feature is off by default, but allows you to set your hours of operation, add holidays, and other days your business may be closed or unavailable for appointments. Configuring business hours will also automatically update any pubic-facing calendars for when you are closed. See Set Business Hours for more information.
- Appointment Types: These are essentially templates that you can define and use whenever you schedule an appointment from within Syncro. For example, you could have different appointment types for on-site appointments vs. phone calls, and video-based meetings. We provide some defaults for you. See Create Appointment Types for more information.
- Appointment Reminder Schedules: These send messages to remind people of their upcoming appointments, both via email and SMS. See Create Appointment Reminder Schedules for more information.
IMPORTANT: Consider whether you want to be able to invoice the Organization for appointment-related charges. If you do, the appointment must be associated with a Ticket. If not, you can create your appointment from the Organization's Details Page.
About Appointment Fields
Syncro requires certain fields and presents you with other, optional fields you can complete whenever you create a new appointment.
Required Fields
When creating a new appointment, you must provide values for the following REQUIRED fields:
- Summary: A meaningful Name for the appointment. Depending upon how you're creating the appointment, Syncro sometimes prepopulates this with “Appointment.” This Summary is displayed on the calendar itself, and sent to your technicians if they have a Notification Set that emails them when an appointment is created.
- Start Time/End Time: Start/End Times default to the current date and time, with an End Time of one hour later. If the appointment does not have a Start/End Time, check the "All Day" box and specify Start/End Days instead. You can click View Calendar (New Window) to pop open your calendar to see your schedule.
Optional Fields
- Select a Ticket to Schedule or Re-schedule: This field only appears when you create an appointment from your calendar. While not required, you will not be able to attach this appointment to a ticket later.
- Description: Enter more details about the appointment. Any appointment details you want to preserve. When you create an appointment while on a specific ticket, Syncro prepopulates this field with the ticket number and ticket title, but you can still edit it.
- Appointment Type: Select from a pre-defined list of Appointment Types. Default values include: Onsite, Our Office, Phone Call, and Remote Support.
- Location: If you create the appointment from an Organization or Ticket, Syncro pre-populates this field for you when you save the appointment. If you create the appointment from another place, or want to change it, enter a different Location here. This field populates the {{appointment_location}} Template Tag in your appointment email templates.
- Appointment Reminders Schedule: Select from a pre-defined list of Appointment Reminder Schedules. Syncro provides one default schedule of “Morning Of and One Hour Before.”
- Appointment Owner: Select from a pre-defined list of techs to change who owns the appointment. By default, it's the currently logged in Syncro User who is scheduling the appointment.
- Additional Attendees: Select from a pre-defined list of users who may also attend the appointment. Doing so will add one appointment to each of their calendars.
-
Do Not Email This Appointment Invitation/Do Not Email (or Invite): If you don't want the person to receive an invitation email, check this box.
Notes:- If you don't want ANY emails associated with the appointment to send, you also need to clear the Appointment Reminders Schedule dropdown menu.
- When this box is checked, the Admin who creates an appointment receives the same appointment notification as the Organization.
Tip: You can modify both the “Non-Ticket Appointment Email” and “Ticket Appointment Email” as described in Customize PDF Templates.
From the Organization's Details Page
To create a new appointment for an Organization from their Details page, follow these steps:
IMPORTANT: If you incur charges for this appointment that you'd like to invoice for later, the appointment must be associated with a Ticket. See also From Tickets.
- Navigate to the Organizations tab/module, then click a hyperlinked “Name/Business” to open that Organization's Details Page.
- Click New and select "Appointment":

Tip: Further down, on the left side of the Organization's Details page, you could also click +New in the Appointments section:
Syncro opens the New Appointment window with the Organization already selected and “Appointment” in the Summary field: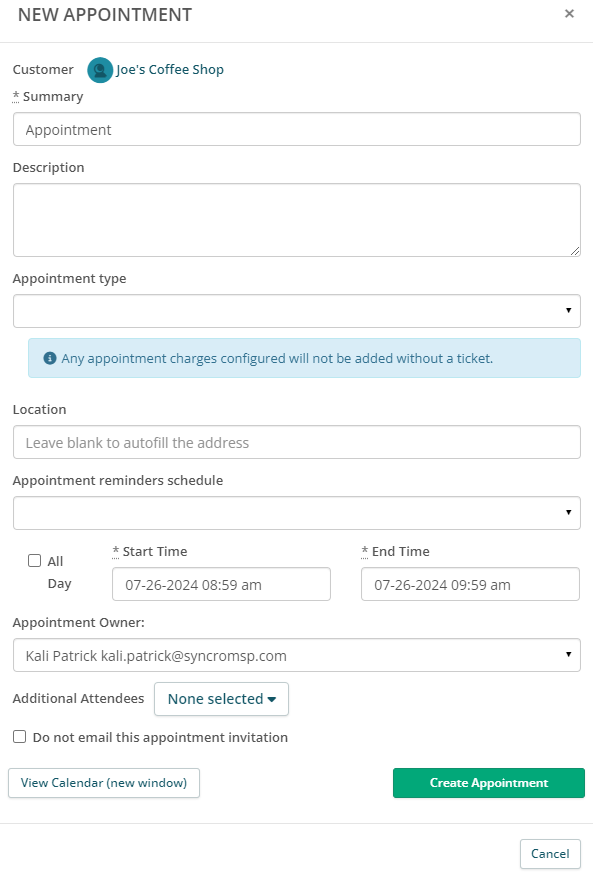
- Provide values for the REQUIRED fields as described in About Appointment Fields.
- If desired, provide values for the OPTIONAL fields as described in About Appointment Fields.
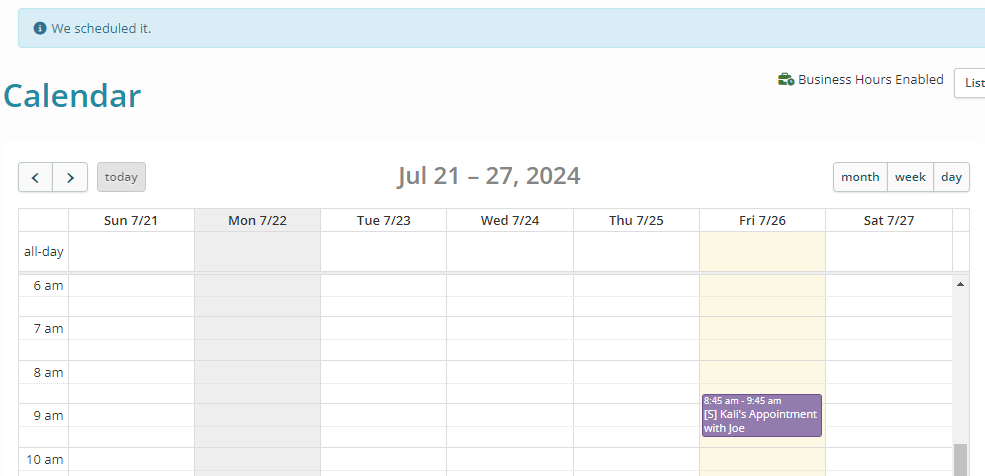
Note: The Admin who creates an appointment receives the same appointment notification as the Organization. This is intentional and can't be disabled unless you check the “Do Not Email This Appointment Invitation” box. - Click Create Appointment. Syncro displays the new appointment on your calendar:
From the Global “New” Menu
IMPORTANT: If you incur charges for this appointment that you'd like to invoice the Organization for later, the appointment must be associated with a Ticket. See also From Tickets.
When you select “Appointment” from the global New menu, Syncro displays the New Appointment window as described in From the Organization's Details Page.
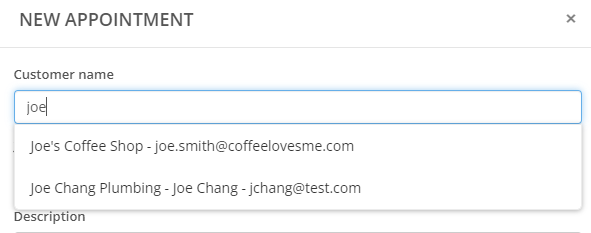
The only difference is that you'll need to type and select an Organization's name for the Customer Name field in the New Appointment window:
Complete the fields as described in About Appointment Fields. Don't forget to click Create Appointment to save your changes. Syncro displays the new appointment on your calendar:

From Tickets
A New Ticket
To create an appointment as you're creating a new Ticket, follow the steps described in Create a Ticket, with the following additions:
- Toward the bottom of the New Ticket page, click Ticket Appointment:

- In the expanded section that appears, complete the fields as described in About Appointment Fields.
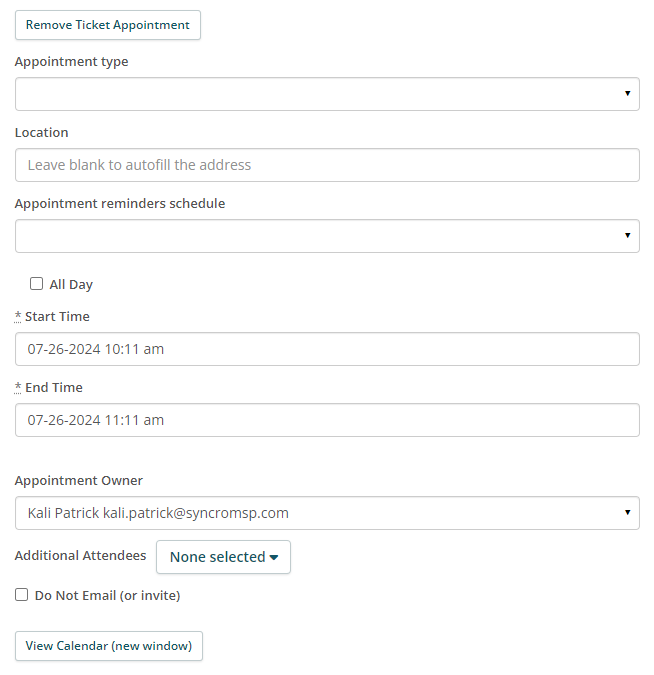
Note: The Admin who creates an appointment receives the same appointment notification as the Organization. This is intentional and can't be disabled unless you check the “Do Not Email (or Invite)” box.
When you click Create Ticket, you'll remain on the Ticket's Details page. Syncro displays the associated appointment in the left sidebar in the Appointments section: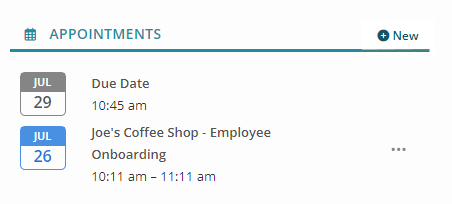
An Existing Ticket
To create an appointment associated with an existing Ticket, follow these steps:
- Navigate to the Tickets tab/module, then click a hyperlinked ticket number to open that Ticket's Details page.
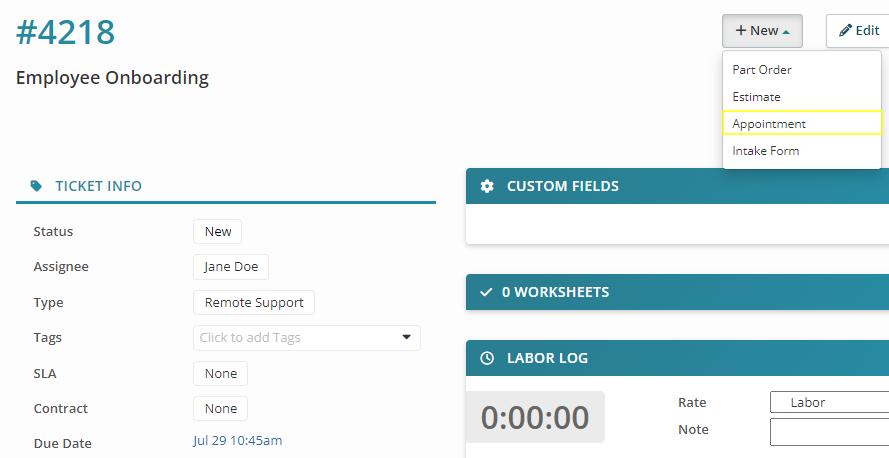
- Click +New and select “Appointment”:
Syncro opens the New Appointment window with the Organization already selected, and some information prepopulated in the Summary and Description fields: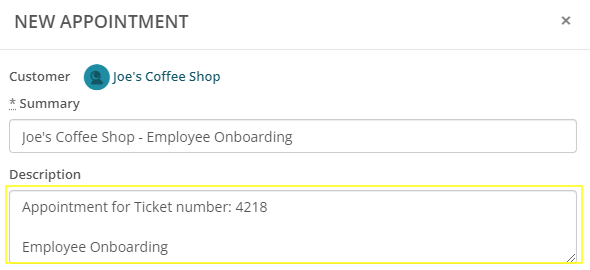
Tip: Further down, on the left side of the Ticket's Details page, you could also click +New in the Appointments section:
- Complete the fields as described in About Appointment Fields. Don't forget to click Create Appointment to save your changes. Syncro displays a "We scheduled it" message at the top of the Ticket's Details Page, and the new appointment appears in the left sidebar's Appointments section.
From Your Calendar
Notes:
- IMPORTANT: Appointments created directly from your calendar give you the OPTION of selecting an existing Ticket. If you do not select one, you CANNOT attach the appointment to a ticket later.
- If there's no need for a Ticket, you could also create the Appointment From the Organization's Details Page or From the Global "New" Menu. If no ticket yet exists, see From a New Ticket.
To create an appointment directly from your calendar, follow these steps:
- Navigate to the Calendar tab/module.
- Use the “Schedule an Appointment” sidebar on the right to complete the fields as described in About Appointment Fields.
Note: The first field allows you to select a ticket. If you do not select one, you cannot attach the appointment to a ticket later: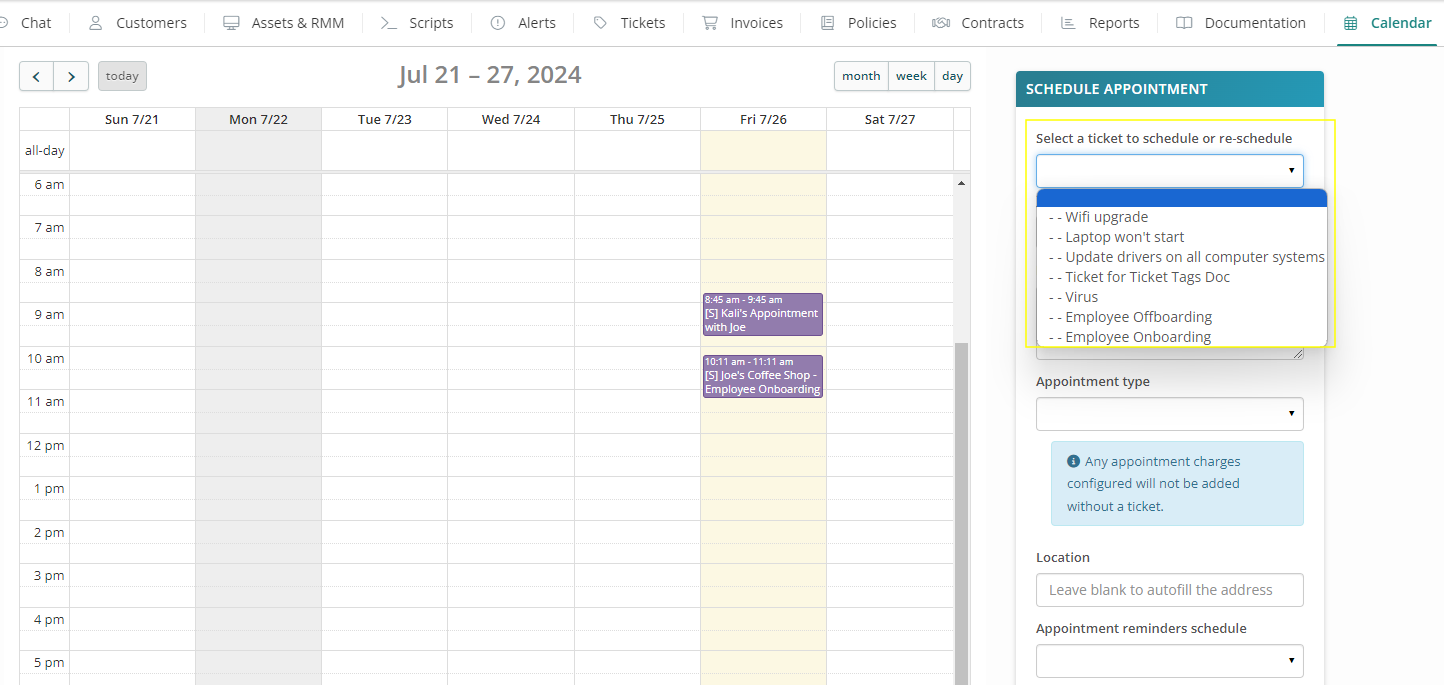
- Don't forget to click Create Appointment to save your changes. Syncro displays the new appointment on your calendar:

