Remotely Access a Machine via Splashtop
Table of Contents
Splashtop is the built-in remote access tool you can use with Syncro. When enabled on a Policy, Splashtop is automatically deployed on your Assets. There is no limit to the number of deployments.
Our partnership with Splashtop means their tool is included as part of your Syncro subscription price. However, End User Remote Access (i.e., allowing End Users to remotely access assets from the End User Portal) is an additional monthly charge per end user. Team Plan subscribers gain access to additional features.
Tip: If you're interested in remote access without interrupting the end user's session, check out the Backgrounding Tools.
This document describes how to set up and use Splashtop to remotely access a machine. You can read on, or watch this short video to learn more:
Notes:
- If you're also running a Bring Your Own (BYO) version of Splashtop, both will be available, but only one can be run at a time.
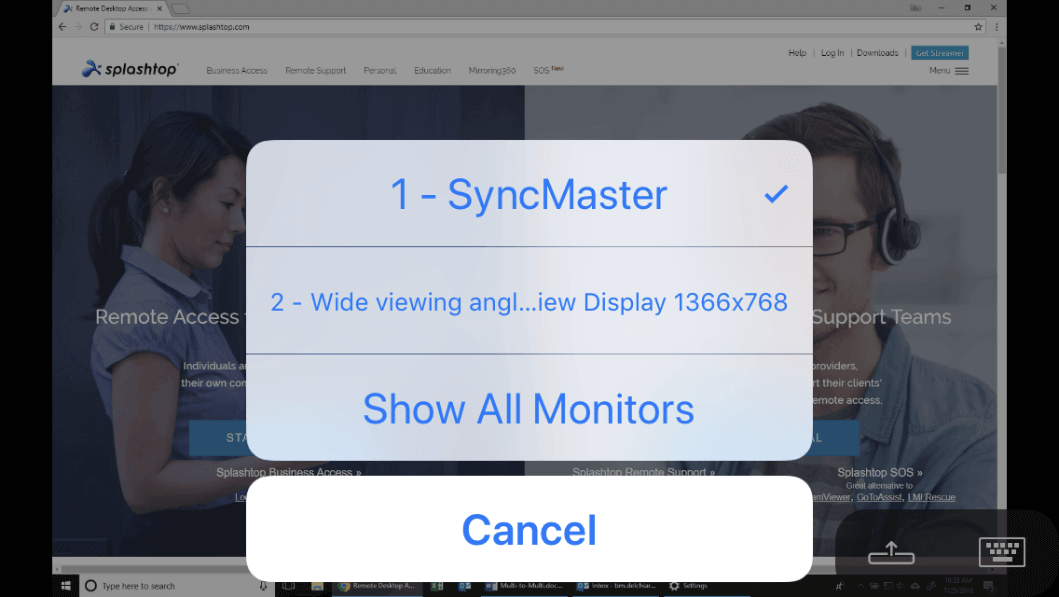
- Simultaneous connections to multiple machines from a single technician is allowed, and multi-monitor toggling is available in the UI.
Prerequisites
You must have a Syncro Agent installed on each asset you'd like to remotely access with Splashtop. There is no one-off or SOS-style support.
Policy Settings
These settings will determine the default settings when you deploy the Syncro agent with Splashtop.
Navigate to the Policies tab and click a Policy to edit it. Then in the left navigation, select Remote Access and check the “Enable And Deploy Splashtop for Assets on this Policy”:

You can optionally check the “Require Client Permission for Remote Access” box.
For more information, see Create a Policy.
Security Settings
Consider the permissions that you need to allow technicians to use the remote access tooling.
Navigate to Admin > Syncro Administration - Security Groups. Then click Edit to view and/or edit permissions for a particular Security Group.
There are two specific security settings you should pay attention to:
- Assets - Allow Remote Access
- Customers - Remote Access Enable
See also Security Permissions Reference.
Starting a Remote Access Session


Download the Splashtop Remote Access Viewer
If a Splashtop remote session has never been started on the computer, use the pop-up to download the appropriate Splashtop Viewer. You can choose between Windows and Mac operating systems.
If the Splashtop Viewer is already installed, close the pop-up to proceed.
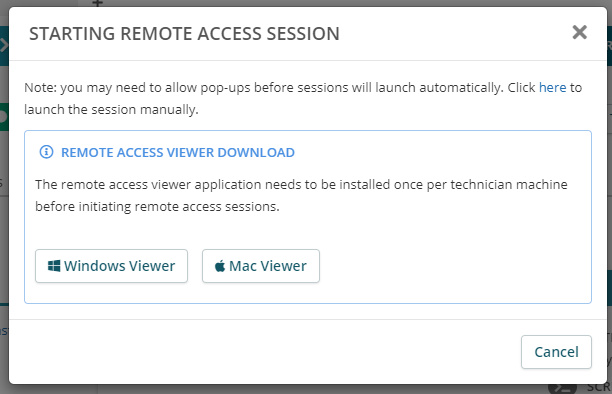
This download only needs to happen once on the machine to allow Splashtop to function from the device.
Your browser then presents a pop-up asking for permission to launch the Splashtop Viewer. You can optionally say that you trust the app so that it doesn't show again:

Enable Splashtop access on a Mac
You will need to add each permission below under the Security & Privacy in System Preferences.
Under Accessibility, add the Splashtop Streamer app by clicking + , or if it's already there, toggle the Splashtop Streamer to On. You’ll be asked to enter your system password, then click Modify Settings:
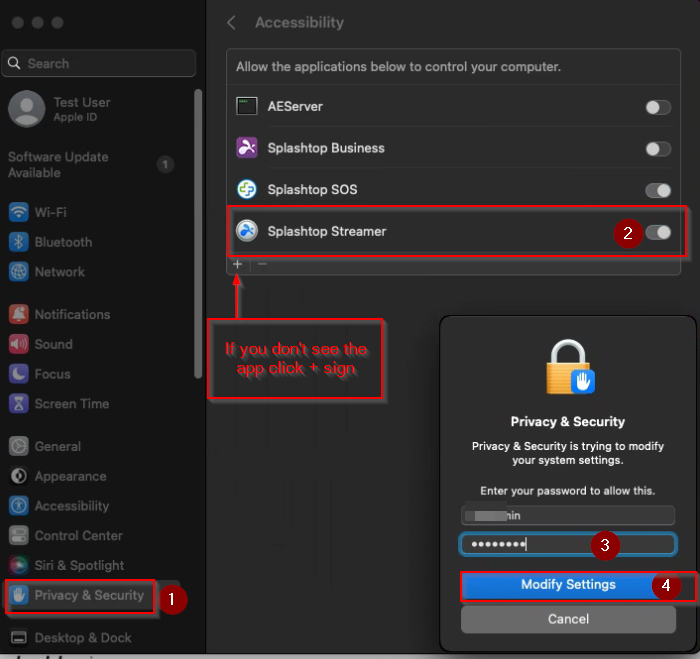
Follow the same process for the other two permissions: Screen Recording and Full Disk Access.
The success window displays with three (3) green check marks:
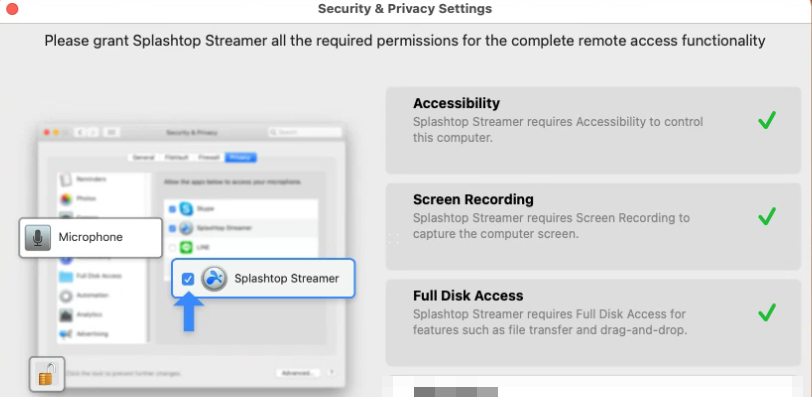
With the Mac permissions set, you should be now able to remotely access the Mac system via Splashtop.
Use Splashtop
When you start a remote session, Splashtop opens in a separate window outside of your browser.
Note: The two screenshots below are the Windows version. The Mac version is similar.
The Splashtop Navigation bar gives you lots of functions, described below:
| Icon | Function |
| Disconnect session. | |
| RDP switch session. Shows if multiple RDP sessions are active on this computer. | |
| Switch monitors. | |
| View resolution scaling options, frame rate settings, remote cursor. | |
| Full screen. | |
| Send Ctrl+Alt+Delete. | |
| Actions: Blank screen, lock keyboard and mouse, paste clipboard as keystrokes. | |
| File transfer. | |
| Chat window for technician input. |
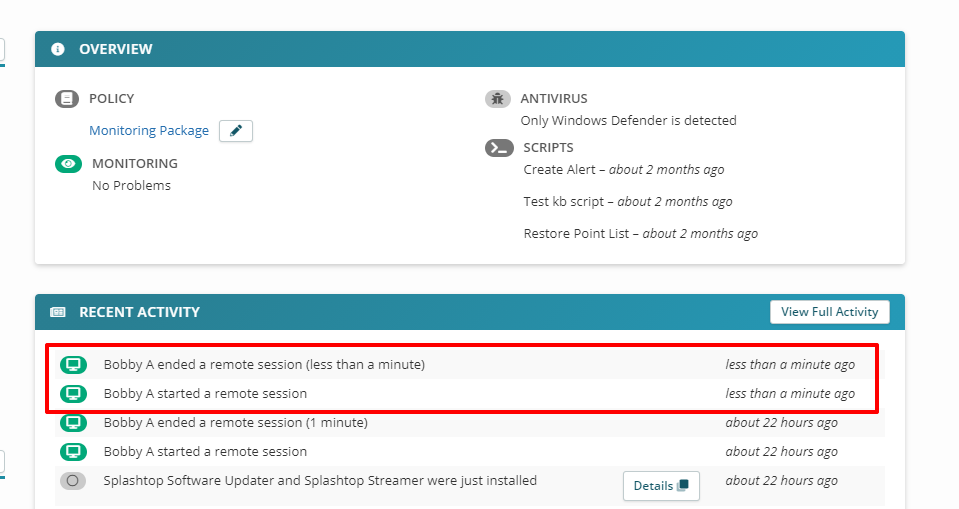
Splashtop session start and session ends are logged in the Asset Recent Activity Log on the Asset Detail page:
Team Plan Features
Multi-Monitor Support
For Windows, Mac, and Chromebook

The first two menu items let you select Monitor 1 (e.g., SyncMaster) or Monitor 2 (e.g., FlexView Display) from the remote system to view on your screen:

Use the third menu item (One Window) to view all monitors from the remote computer on one local screen. This is also known as multi-to-one.
Use the final option (Multi-Window) to view each remote monitor in a separate window on your local computer. This is also known as multi-to-multi. You can arrange those windows on multiple local monitors.
For iPhone and iPad

For Android Phones and Tablets

Multi-User Sessions
Up to two different technicians can connect to the same desired remote computer (as they normally would from Syncro).
Both users will see the screen and have control, as if they were sitting at the computer.
Remote Access Session Recordings
Record remote access sessions to a Technician's local computer for better oversight. The recorded session is saved to the Technician's local computer.
Tip: Learn more about Session Recordings from the Splashtop website.
Splashtop FAQ
Do I need to log into Splashtop to use it?
There is no instance of Splashtop to log into. You'll trigger remote access sessions directly from within the Syncro platform.
What browsers are supported by Splashtop?
IE, Mozilla Firefox, Google Chrome, Microsoft Edge.
Will Syncro remove Splashtop when I remove it from a Policy or Asset?
Because there are many versions of Splashtop--including those where it can be installed by the end-user--we will not uninstall Splashtop. See Disable & Uninstall Splashtop for more information.
Can I use this if Splashtop is already installed on an Asset?
Most of the time, yes. It will run alongside most versions of Splashtop with other RMM-provided versions of Splashtop being the exception. If the Asset has another instance of Splashtop that was installed by another RMM using the RMM edition, there will be a conflict and neither instance will work until the one of them is uninstalled.
What security protocols are in place for Splashtop?
Syncro simply facilitates the connection to Splashtop. Please refer to Splashtop's Remote Access Security page.
How can I tell which Organizations have Splashtop access enabled and how much I'm being charged?
Navigate to Admin > Reports and in the Customers section, run the Splashtop End User Charges Report.


