
Configure SSO with Microsoft Entra ID (Azure AD)
To configure Single Sign-On (SSO) with Microsoft Entra ID (Azure AD), follow these steps:
- Launch your Azure Instance, then click the Microsoft Entra ID pyramid logo:

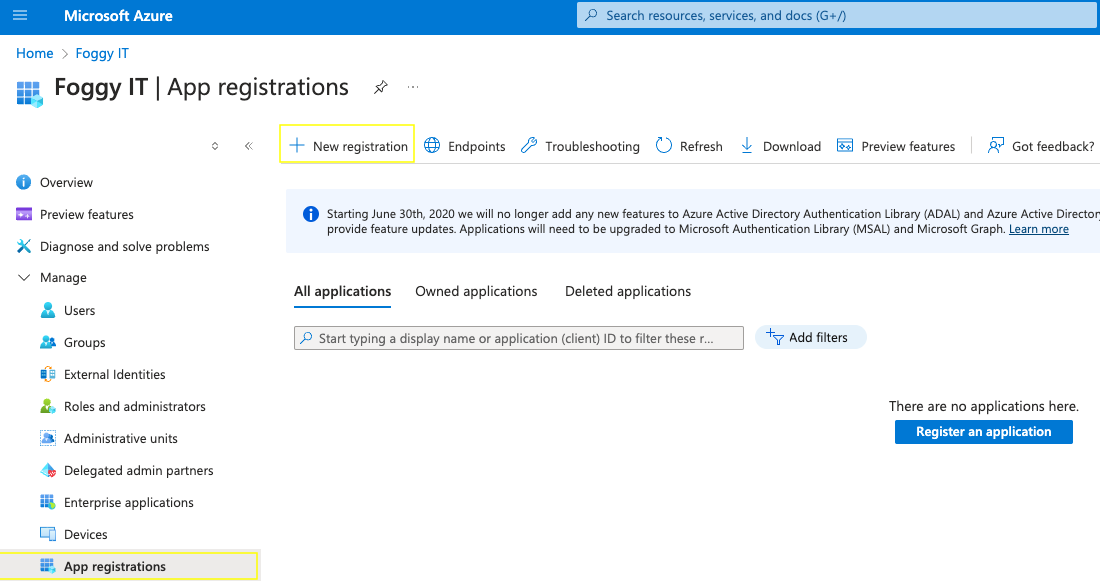
- In Entra's left navigation, select “App Registrations" from the Manage section, then click + New Registration:
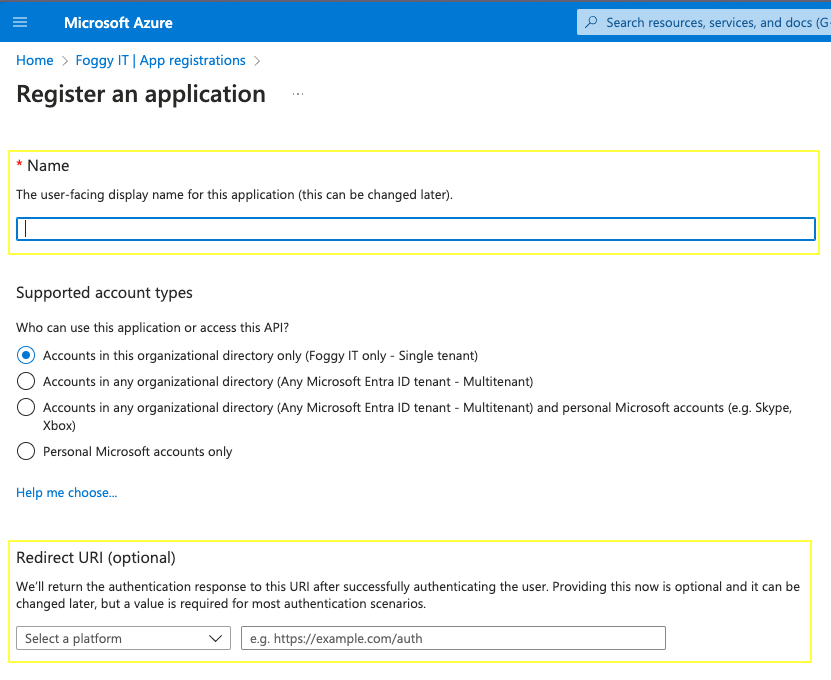
- On the Register an Application page:
- Enter a name for the App so you can identify it later (e.g., “Syncro,” “SyncroMSP,” or whatever you’d prefer).
- In the Redirect URI area, select “Web” from the Platform dropdown menu.
- Copy the Redirect URI from Entra and paste it into the "Redirect (callback) URL" field in Syncro:
Note: Navigate to Admin > Syncro Administration - Login Settings and you'll find it in the “Single Sign On with OpenID Connect” section field:
- Back in Entra, click Save. Entra navigates you to the App’s details page, which displays several strings.
- Copy the “Application (Client) ID” string from Entra and paste it into the “Client ID” field in Syncro:

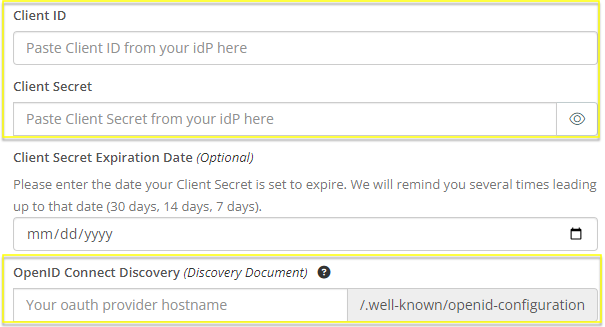
Note: The screen above highlights additional fields you'll need to provide Entra strings for in later steps. - In Entra's left navigation, select “Certificates & Secrets" from the Manage section, then click + New Client Secret:
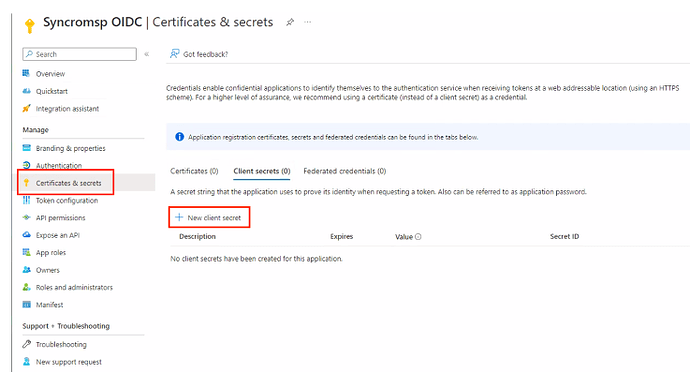
Entra displays the “Add A Client Secret” side panel:
- In the Description field, enter a name for the Secret that you'll use to manage it later.
- Use the Expires dropdown to choose a expiration for the secret key. Entra generates a set of Secret keys.
- Copy the “Value” string from Entra and paste it into Syncro's “Client Secret” field (shown on the screen in step 5):
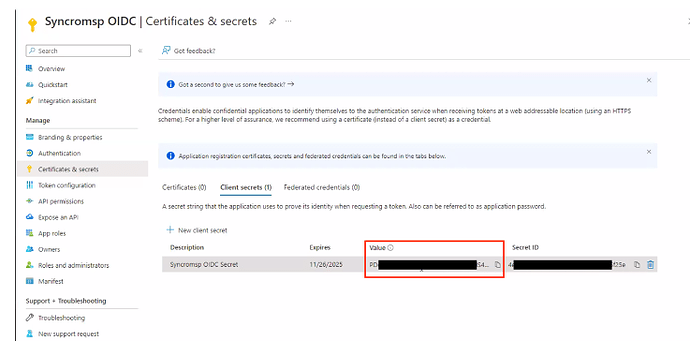
Note: If you copy the “Secret ID” field here instead, you'll get an authorization error.
- In Entra's left navigation, select “Overview”, then “Endpoints:”
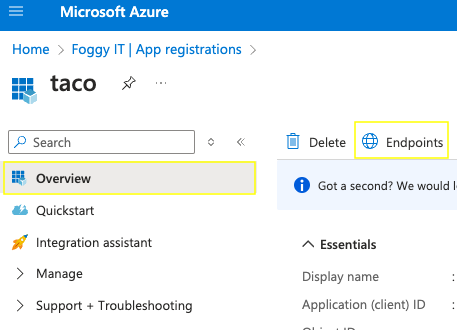
Entra displays the “Endpoints” side panel and a group of fields.
- Copy the contents of the “OpenID Connect Metadata Document” field into Syncro's “OpenID Connect Discovery (Discovery Document)” field (shown on the screen in step 5):
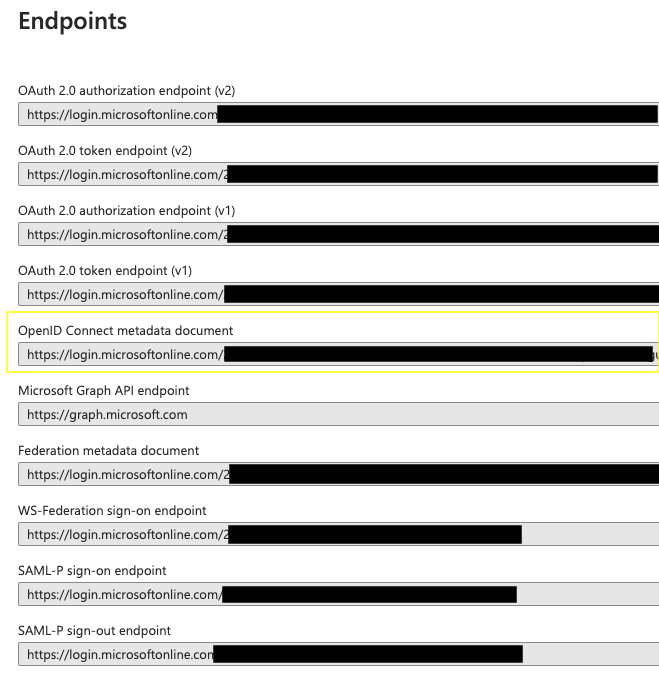
Tip: Don’t worry about cleaning up the URL; Syncro parses the URL string for you.
- In Syncro, click Save & Verify SSO.
Tips:
- If you receive the error message: OpenID Connect Discovery: is invalid, this means that the URL for the OpenID Connect Discovery field is not correct.
- If you receive the error message: SSO configuration contains errors. Please check and verify again., this refers to the Client Secret not being correct. This can happen when a copy/paste includes junk data from the clipboard. Syncro recommends going back to the idP and trying to copy/paste again.
- Once the connection has been validated you can click Enable SSO to toggle it on. Remember to click Save.