Work with Event Log Policies
Table of Contents
Event Log Policies enable you to easily monitor assets for problematic events. You can create new event log policies, or clone and modify Syncro-provided ones.
Each Event Log Policy contains Syncro's default event log queries, and will also display any custom queries you might create.
Create a New Event Log Policy
To create a new Event Log Policy from scratch, follow these steps:
- Navigate to the Policies tab/module.
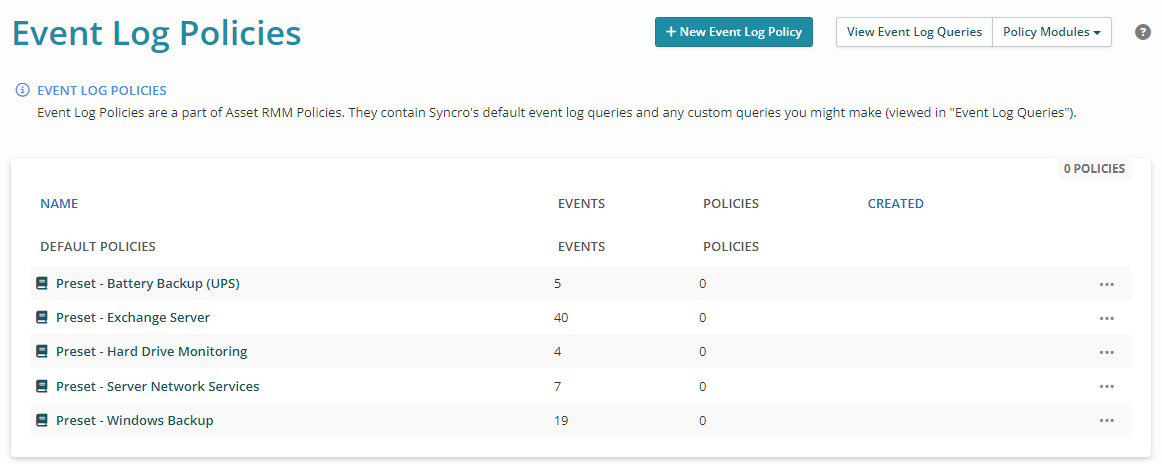
- In the upper-right corner, select Event Log Monitoring from the Policy Modules dropdown button. Syncro displays the Event Log Policies page:

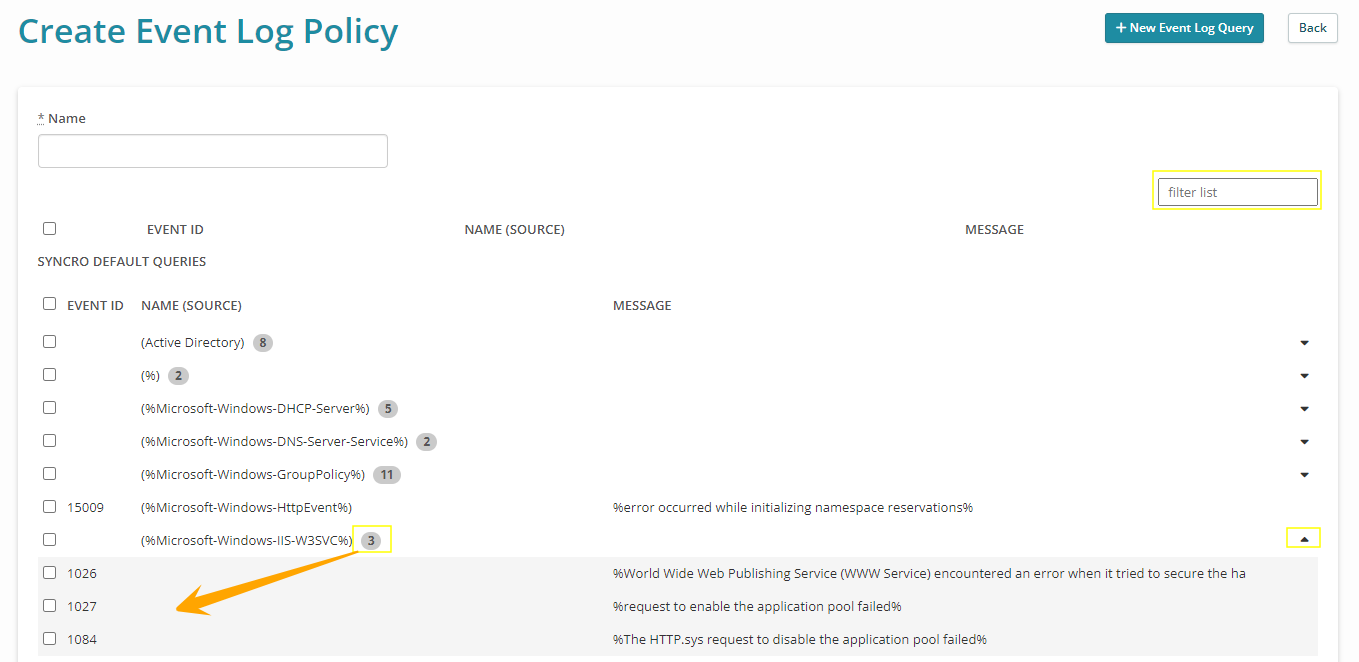
Tip: The Policy Modules dropdown button is available on any policy-related page in Syncro. - To create a new one, click +New Event Log Policy. Syncro displays the Create Event Log Policy page:

Tip: Type in the Filter List box to narrow down the list of queries. - Enter a useful Name for the policy.
- In the SYNCRO DEFAULT QUERIES list, check the Event ID box(es) next to the events you want to monitor.
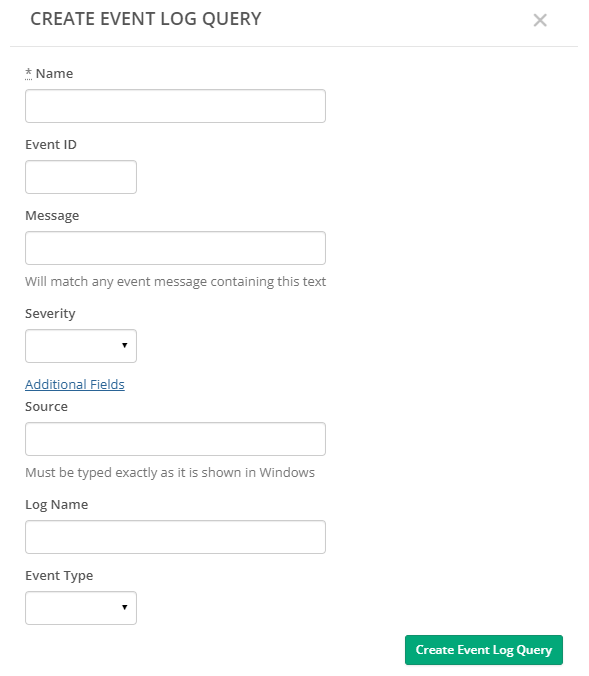
Note: When there are multiple Event IDs in a NAME (SOURCE) category, you can click the check box on the category to select them all. Or, click the caret to expand the section to select them individually. (The number in the bubble tells you how many there are.) - If desired, click +New Event Log Query. Syncro displays the Create Event Log Query pop-up window:

- Enter a useful Name for the event.
- Specify any message ID, the message to be matched, and select the Severity (Critical, Error, or Warning).
- Click the Additional Fields link to further specify the Source (which must be typed exactly as it is shown in Windows), the Log Name, and select the Event Type (Error, Warning, Information, Success Audit, or Failure Audit).
- Click Create Event Log Query. Syncro displays your Custom Queries at the top of the Create Event Log Policy page in a CUSTOM QUERIES section:

- In the CUSTOM QUERIES list, check the Event ID box(es) next to the Event Log Query you just created.
Tip: Click View Event Log Queries to navigate to the page that allows you to view and add custom event log queries; click View Event Log Queries to flip back to that page.
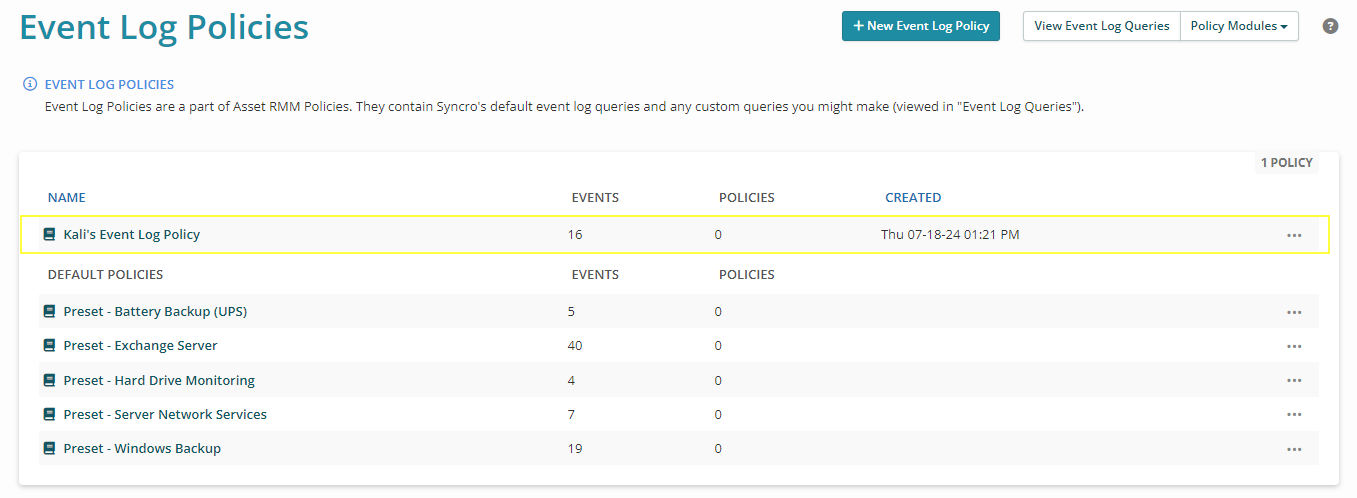
- Click Save Event Policy. Syncro displays your new Event Log Policy at the top of the table, above any Syncro-defined ones:

Edit an Event Log Policy
IMPORTANT: These instructions relate to editing an Event Log Policy you've created. If you want to make modifications to a pre-defined, Syncro Event Log Policy, please clone it first.
- Navigate to the Policies tab/module.
- In the upper-right corner, select Event Log Monitoring from the Policy Modules dropdown button. Syncro displays the Event Log Policies page:

Tip: The Policy Modules dropdown button is available on any policy-related page in Syncro. - Click a hyperlinked policy Name to edit it. (Or, click the triple-dot icon and select Edit.)
- Follow the instructions in Create a New Event Log Policy to make any changes.
- Be sure to click Save Event Policy when finished.
Clone or Remove an Event Log Policy
- Navigate to the Policies tab/module.
- In the upper-right corner, select Event Log Monitoring from the Policy Modules dropdown button. Syncro displays the Event Log Policies page:

- For the Event Log Policy you want to clone or remove, click the triple-dot icon then select Clone or Remove.
- Clone puts you in edit mode for an Event Log Policy that has the word “Clone” appended to the original name. Enter a useful name and make any other changes. Be sure to click Save Event Policy when finished.
- Selecting Remove will ask you to confirm; click OK. (The Remove option does not appear for Syncro's DEFAULT POLICIES.)
